• TwitterFacebookGoogle PlusLinkedInRSS FeedEmail

Baby Crafts

Free baby craft crochet patterns. Baby Shower Ideas Gifts Scrap-booking, Decoupage, Feng Shui, Origami. Homemade crafts green crafts Halloween baby crafts.

  • Home
  • About Me
  • Contact Me

Friday, February 18, 2011

Embroidered Pillow Case = A Cute Bag?

1:26 AM  article, Embroidered, guide, Homemade, information, inspiration, interesting, sewing, stitching, tutorial  No comments

 
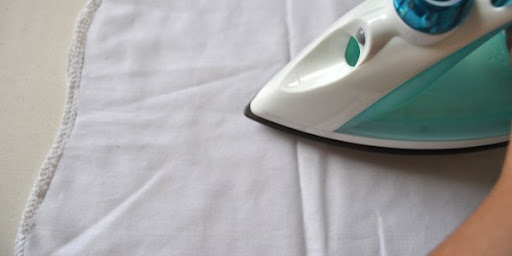
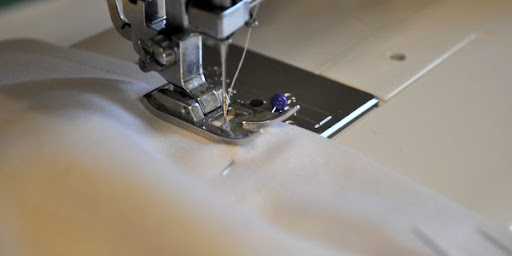
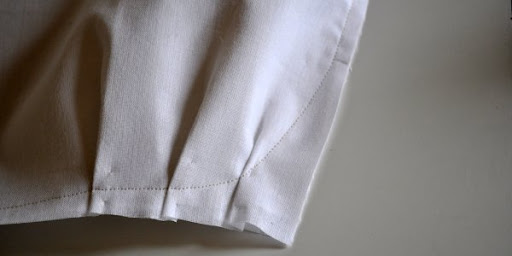
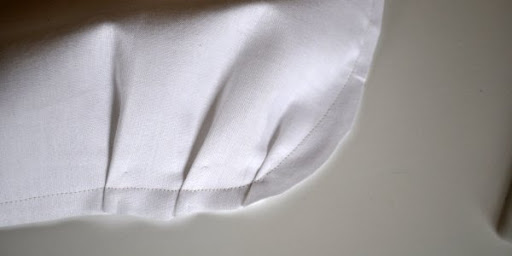
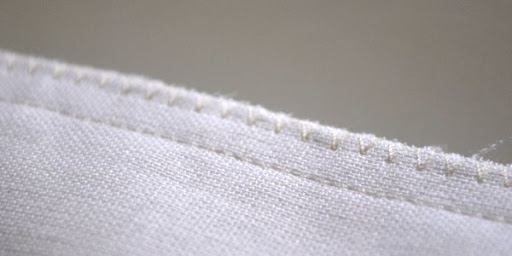
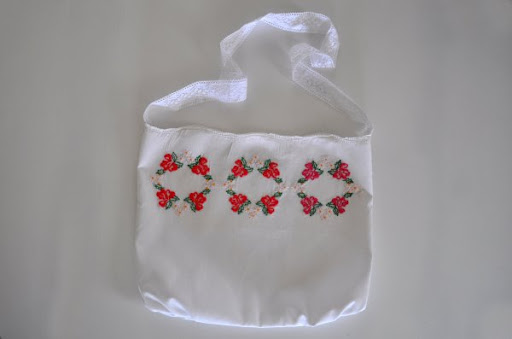
So um yeah...This tutorial will teach you how to turn a Pillow case into a stylish bag. For you or your younger daughter. I have done this and it turns out to be quite good so good you could sell them. So with that being said lets dive right in and get started shall we.


I already told you about my addiction to vintage pillow cases, they have personal details that work great for all sorts of things – clothing, clutches, pillows, bags, aprons.  If you look through your local thrift store stock your bound to find some with hand embroidery for right around a dollar.  At a vintage or antique store you will pay anywhere from $4 on up.  My last visit to my local DI (like a goodwill) I scored five of them, and this was one of them.
It was hanging there, feeling extremely unappreciated for it’s beauty.  I mean seriously!  How much time do you think someone had into this one pillow case?!  It even has a delicate scalloped and crochet trim!  It had never even been washed, or used.  I could tell because who ever made it left a raw edge on the seams that had only barely frayed.  Me and my sister decided a grandma made it for her grandson for a wedding gift and the new bride folded it up, afraid to use it…and then 30 years later decided to donate it.  Sounds good right?
Well I’m not afraid to use it.  Nope, I will put it to use every day now, just as intended I would think.  It made the cutest tote I have ever owned.  So if this pillow case looks familiar, if your fingers sat for hours hand embroidering every little detail, then crocheting a lovely little trim…thank you very much.  I love it!
Here is how I did it:

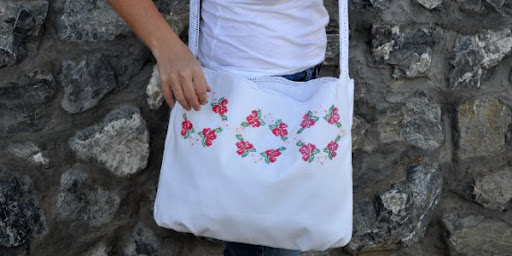
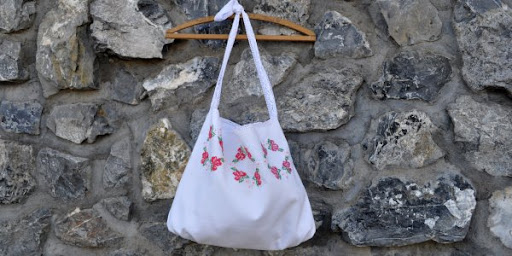
Turning a Pillow Case Into a Shoulder Bag Or Cross Body Tote
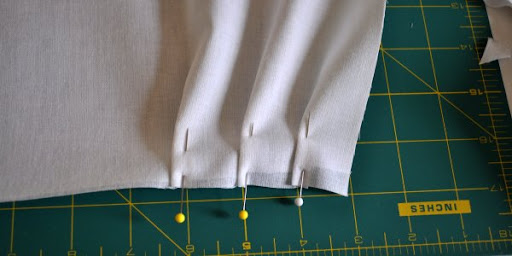
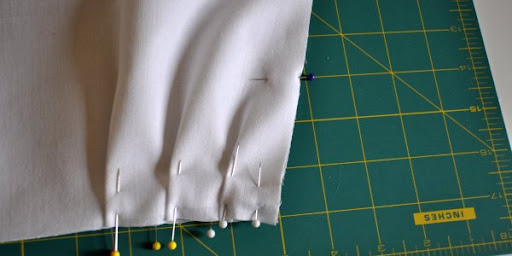
Supplies:
  • all your sewing stuff
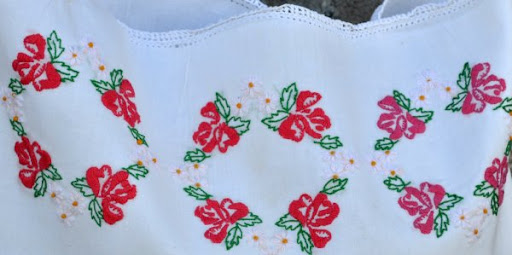
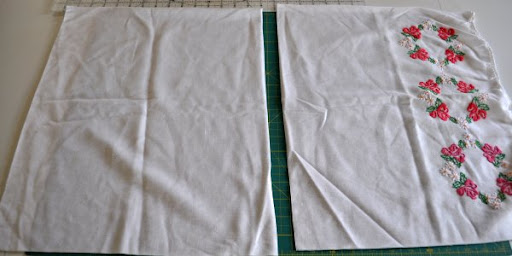
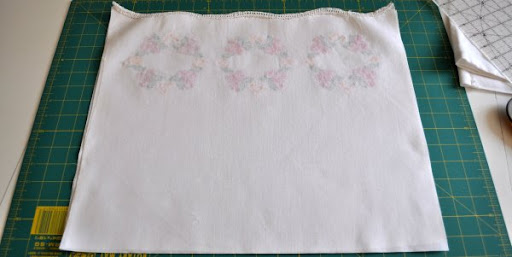
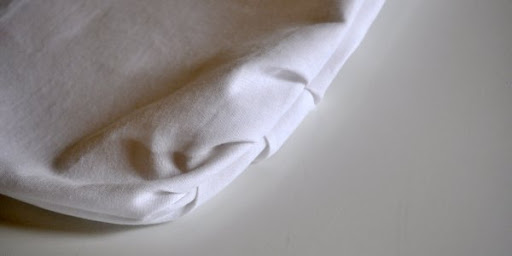
  • pillow case, any will do, but I highly recommend saving one from a thrift store, oh the thrill of the hunt!
  • matching thread
  • interfacing for liner if you want, I used a lightweight one
  • material for straps, I used a basic crochet trim to match
Start by cutting the sides off the pillow case.  I wanted a larger bag so I only cut off a little, but this will work for a smaller bag too.  Just cut it down to the size you want.
Same goes for the length, cut it to the length you want.  I cut my pillow case in half, and that worked great.  I didn’t use my other half but you may decide to use it in the next step.
Now iron your interfacing to the wrong sides of both the front and back pieces.  I believe the one I used is SF 101, but please don’t quote me on that.  It feels just like a lightweight woven cotton so it works perfect for the lining in this project.  If you want you can use the other half of your pillow case for the lining, but with the scallop and trim on mine I decided to go this route.
Now center your pieces on a cutting board, or use a ruler, and with the right sides together.
Now this part doesn’t have to be exact, so don’t worry!  We just want to add a few pleats to round out the bottom of the bag.  I started at one end on the bottom of the bag, an inch from the side, making a ¼ inch pleat.  Then I added two more an inch apart as shown, and repeated on the other side.  Now flip them over and repeat the process on the back piece.
With the right sides still on the inside, pin the two pieces together at the corners and then again about three inches up from the bottom on both sides.  This will act as a guide when sewing the seam where.
Now with a straight stitch and starting at the top of one side, sew with a ½ inch seam down to the pin that is three inches from the bottom.  At this point start curving toward the first pleat, so that when you reach the third pleat you will be back to your ½ inch seam allowance, then just keep sewing along the bottom until you reach the third pleat on the other side then start curving toward the pin, then all the way to the top of that side.  Make sure you are back stitching!
Your corners should look like this.  Just a little curve.
Then you will want to cut off the corners.
Now sew a zigzag stitch along the entire seam, enclosing the raw edge.  Now turn inside out…you’re almost done!
Like your pleats?  They look nice huh.  They make for a nice little rounded bottoms.
Now we need to add the handles.  I tucked mine into the inside and included them with the top stitching I did around the top of the bag, which ensures the interfacing stays put.  At the points where the straps are sewn to the bag I made sure to do a couple rows of stitching for stability, just on the strap.
I did one large strap for a cross the body bag (my fave) with the length coming in at 45 inches, but you could do two straps for a shoulder bag if that is what you prefer.
Isn’t she cute?  And so easy!  All I had to do was a little cutting and sew a few lines, someone else did the hard work!
Have you found any great pieces where someone has put a lot of work into them, and you think they might be happy to see someone enjoying it?  Even if you did cut it up a bit?!

More great tuts at The Mother Huddle

Email ThisBlogThis!Share to XShare to Facebook
Newer Post Older Post Home

0 comments:

Post a Comment

Connects

Blog Directory


Feedage Grade b rated


  • Popular
  • Tags
  • Blog Archives
  • Spread Happiness With Eeyore Re-DUX
    Well I'd like to start off  by telling all of Eeyores adoring fans sorry for the wait. He is now back and here to stay. He has even brou...
  • Spread Happiness With Eeyore
      CHECK OUT THE RE-DUX EEYORE IS BACK AND HERE TO STAY Very busy day yesterday sorry I didn't get to post a pattern that. I prom...
  • Spread Happiness With Pooh Bear
    So here I am again with a late post. But I come bearing a gift so all is not lost. Check it out I got a cool craft of one of my favorite ch...
  • How To Easter Craft | Paper Easter Basket
    How-To: Weave a Paper Easter Basket   This craft was not produced by me but the lovely Diane Gilleland. she wrote the book on the suff ...
  • A Very Simple Decoupage Tutorial
    What You'll Need (Now In Color : 0): -Something to decoupage on:   Old shoe-boxes can be a great place to start (and are free so ther...
Powered By Blogger

Pintrest Follow ME

Follow Me on Pinterest
© Baby Crafts. Powered by Blogger.

My Fav's

  • A Little of This and a Little of That

Labels

  • article
  • baby
  • baking
  • best sausage breakfast casserole
  • card
  • clothing
  • cooking
  • craft
  • crochet
  • decoupage
  • doll
  • download
  • easy sausage breakfast casserole
  • Embroidered
  • feng shui
  • Floam
  • guide
  • hat
  • Homemade
  • how to make stickers at home
  • idea
  • information
  • inspiration
  • interesting
  • jimmy dean sausage breakfast casserole
  • life
  • magazine
  • make vinyl stickers at home
  • make your own vinyl stickers
  • make your own vinyl stickers at home
  • note
  • origami
  • paper to make stickers
  • pattern
  • pdf
  • printer paper to make stickers
  • recycle
  • safety
  • sausage breakfast casserole recipes
  • sausage breakfast casserole with crescent rolls
  • sewing
  • stitching
  • to do
  • tutorial
  • Valentine
  • video
  • wax
  • weeding
  • zen garden

Blog Archive

  • ►  2016 (3)
    • ►  May (2)
    • ►  March (1)
  • ►  2015 (3)
    • ►  July (2)
    • ►  May (1)
  • ►  2012 (5)
    • ►  June (3)
    • ►  May (2)
  • ▼  2011 (9)
    • ►  October (1)
    • ►  April (1)
    • ▼  February (2)
      • Embroidered Pillow Case = A Cute Bag?
      • Valentine Flower Crafts for Kids
    • ►  January (5)
  • ►  2010 (1)
    • ►  August (1)
  • ►  2009 (31)
    • ►  June (13)
    • ►  May (18)

Recent Posts

Follow @bgardner

Follow this blog

 
  • Blogger Tutorials | Tools , Tips , SEO, Facebook tricks

    Loading...
  • Blogger Templates Gallery

    Loading...
  • Pages

    • Home
    • YouTube Crafting Videos
    • About Me
    • Contact Me
Copyright © Baby Crafts | Powered by Blogger
Design by FThemes | Blogger Theme by Lasantha - PremiumBloggerTemplates.com | NewBloggerThemes.com Distributed By Gooyaabi Templates