My caring, nonnie, was a loving and grandmother lady that grew up in northern undulating hills West Virginia. Barefoot wasn't merely for springs and rivers, it was a way of essence. Of course, she was raised among 'grey toothed' coal miners who wore tuxedos of coal soot, the hands gnarled by a rough dues weeks work. Nonnie was far from a plain girl however. Painting, writing and even were mainstays of her health, from birth to death. Now please pay attention. It was cooking, when anything defined my grandmother. In her younger months, not cooking meant notconsuming.a good food item you spent a penny on was a piece of candy, and that was a rare treat. You can find some more information about it here.one concern that often amazed me about Nonnie's cooking was there in no circumstances was a cookbook cropped up on its side. There under no circumstances was a piece of paper with measurements scribbled on it, nor were there any index cards popping out of square boxes. Consequently, it was all in her head. Thus, every spoonful, every drop or ever mix. Basically, down to every finite detail, every detail of every recipe was stored in her vault of memories. Let me ask you something. Would you mind writing down quite a few of our own recipes? I will love to, she said, as when she had simply been waiting for somebody to ask.

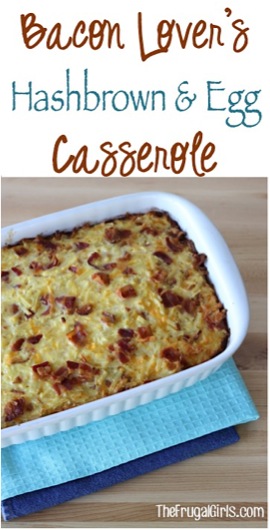
For more recipies check: Sausage Breakfast Casserole
Needless to say, currently I have 2 treasured collections memorabilia from my grandmother. One was usually her vast collection of Renaissance painters compendiums, from Michelangelo to Raphael. Anyways, the additional was probably a short square box they keep locked in a safe, its contents more precious than gold. Seriously. Nonnie as well as you are will be a better cook than me. Of course cause she should love sharing rather thought on the Internet, they will share with you her Egg and Sausage Breakfast Casserole, a dish that we have got more than my fair share underin no circumstances missed a holiday. Drop crusts from bread. Spread the butter over bread. Obviously, place in a greased 13x9x2" baking dish. In reality, cook the sausage until stir to crumble, drain as well as browned well. Spoon over bread slices and sprinkle with cheese. Ok, and now one of the most important parts. Combine for any longer with the salt. Then, mix well and pour over cheese. Cover and chill overnight. Remove from fridge fifteen mins prior to baking. Bake uncovered at 350 degrees for 45 minutes or until set. Look for more recipes and stories there.